onsdag den 20. januar 2016

River's Journal

I started the new year needing af new notebook for scouting stuff and since the pockets of the scout uniform is slightly wonky in size, I decided to make one from scratch. I have been meaning to try my hand at book binding for a while, and had been doing a fair amount of searching on pinterest for inspiration. And at the same time, since the Doctor Who Christmas Special I have been looking at Tardis-inspired earings, also on pinterest. Somehow the took got mixed up in my pinterest feed, and before I new it, I had pins about how to make a replica of River's Journal in my pinterest feed, so when it came to decorating my new notebook the answer was,sort of, obvious.


I based my work primarily on this snapshot from the episode Let's Kill Hitler, and used 3 mm thick crafting foam for the outer layer. The choice fell on that mostly because I had it lying around and this wasn't a project that was supposed to cost me any money. I ended up buying new paint, because Tardis blue isn't the easiest colour to find. For some weird reason my local craft store doesn't have a paint called Tardis blue ;)

I'm not going to show the process of making the book. If you want to make your own from scratch you can find plenty of good descriptions online, or you can simply use a book you already have or buy one.
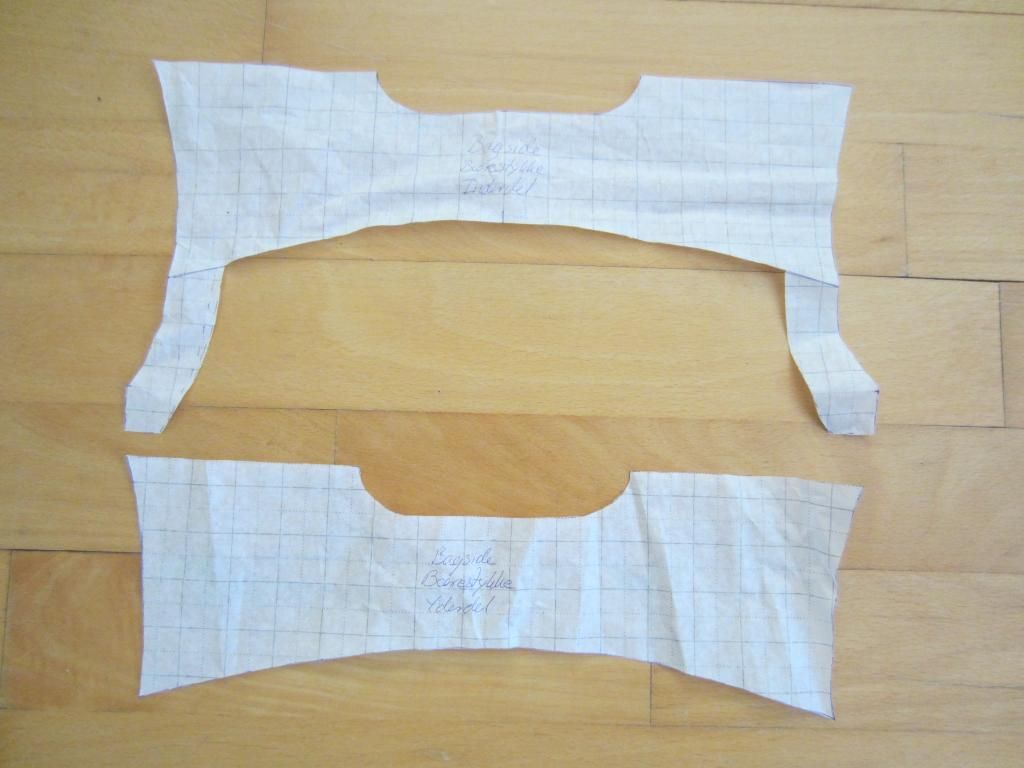
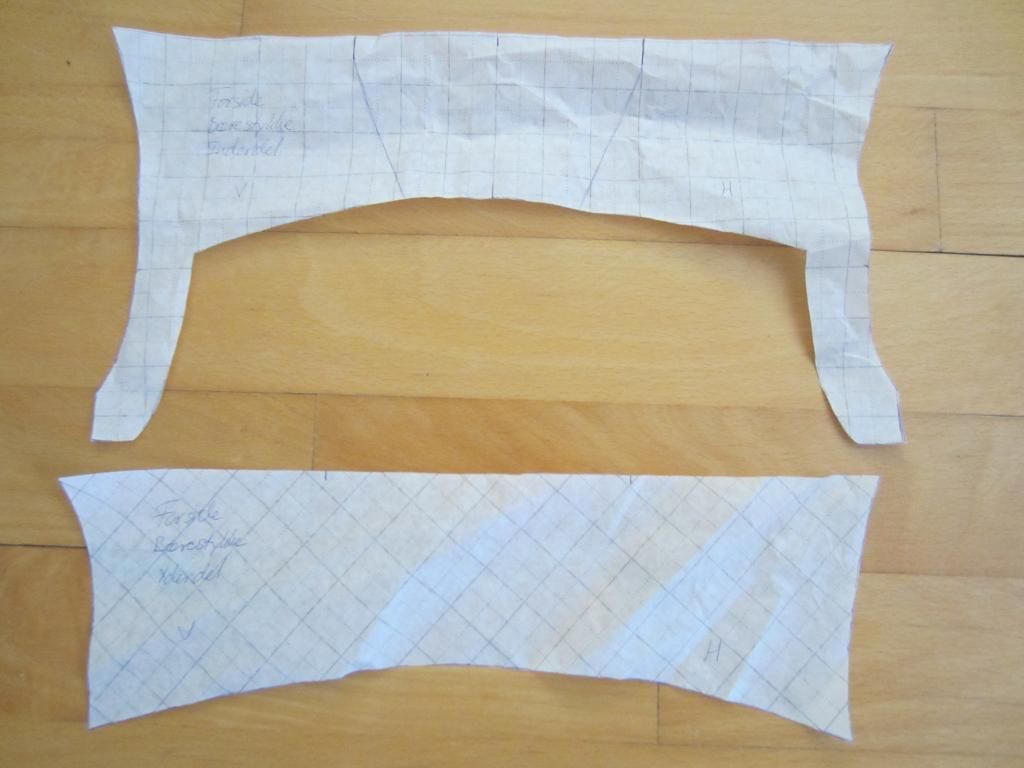
First step is measuring the cover and making a paper template the size of the cover. I used this for making the template of all the craft foam parts. On this template I added lines about 1 cm from the outer etches all the way round, and the 0.5 cm from the centerline, on both sides of the line. The template then had to rectangles, which I drew a line across to divide them in four rectangles of equal size. And those four rectangles I once again divided down the middle, so I had eight squares. The template now looked like the picture below.


Next step was adding inner squares into each of the squares so. The space between the outer and inner squares was 0.5 cm on my template. 


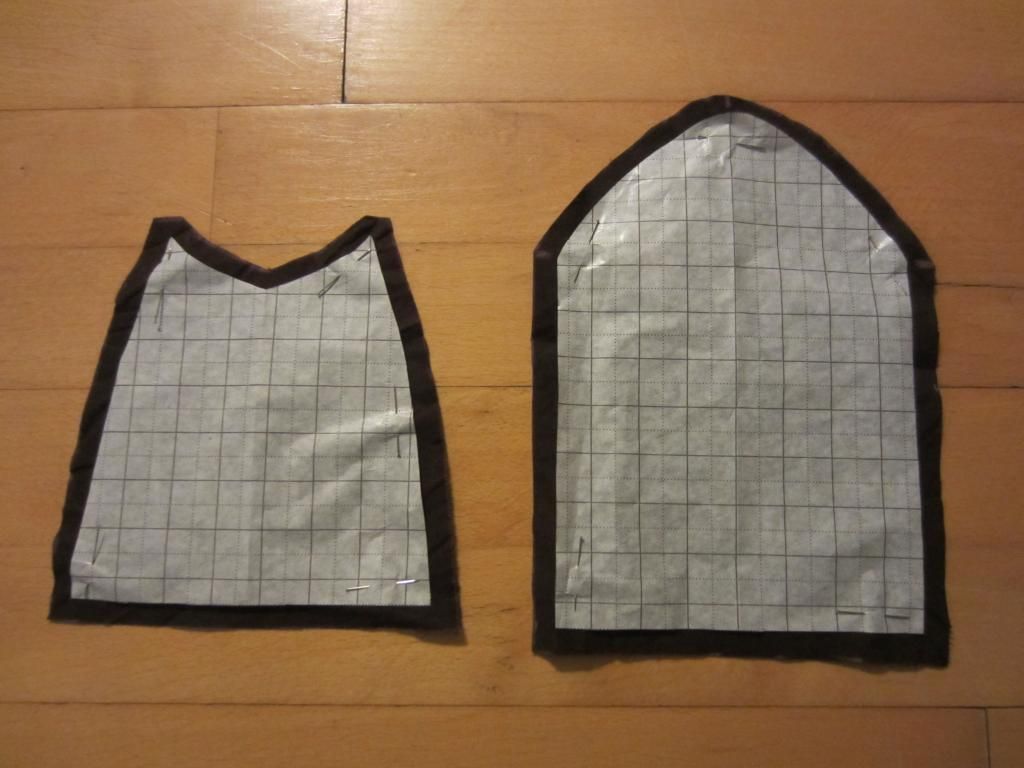
Next step was cutting out the template, which left me with 8 squares the inner squares and to sets of outer rings. I then transferred the paper template onto the craft foam.


 When cutting out the the lines on the craft foam I cut first on one side of the line and then on the other side. This allowed me to create the valleys on the diary as part of the foam was missing. It is a good idea to lay the foam on the book to check if more foam needs to be removed to create the valleys before gluing the foam to the book.


Once I was happy with all the valleys  I glued the craft foam to the cover of the book and after letting the glue dry I painted the book in Tardis blue.


Next step is letting the paint dry, while cutting the craft foam for the other side of the book. Once both sides are painted and dry you are done.


Here is what my finished book looked like. You wont get a picture of what it looked like before I started using it, because I started using it before I finished the back of the book. I am very happy with it, especially since I only spent an afternoon on it. It works for me and gets a some nice comments from geek friends, which is always nice :)

- trager


onsdag den 8. april 2015

Weeping Angle Statue

Last fall while I was finishing up my master thesis I happened across a blogpost with a describtion on how to make a weeping angel statue using a barbie doll as the starting point, and thought it a perfect project for getting back to being creative after all the thesis work. Also as Lora is a Doctor Who fan I thought it would make a nice gift for her. The original post about it is here, since I did not have access to the same materials without spending a lot of money on freight, I ended up making a slightly different version.

Materials:
Barbies (I found mine used at a yard-sale for 10 DKK/1.5 USD)
Empty can
plaster
steel wire
silicone joint filler
Small stick
Smal hair band (I used the type typically used for horses)
Hot glue and liquid glue
Fabric
Cardboard
Feathers
Gray primer
Granite paint

Tools:
Cutting tool (I used both a miniature saw and a utility knife)
Glue gun 
Scissors


The first thing to make is the stand. I decided to use an empty can as the base of this. I punched a hole in the top of the can through which the support for the Barbie doll wound go. On my first try I punched the hole in the centre of the can, which I later learned was a bad idea, so it is a good idea to punch the hole a bit to one side of the centre instead.
To make the empty can heavy enough that it would not topple over when the Barbie doll was attached I filled it with plaster. First I inserted a small stick through the hole, to serve as support for the Barbie doll. Then I added a twisted piece of steel wire inside the can and sealed the hole around the support stick and the steel wire with silicone joint filler, before adding liquid plaster to the can, and letting it set. The steel wire was inserted to ensure that the plaster would not simply be able to fall out of the can once set.
Next step was removing half of the arms of the Barbie doll. I cut through the dolls elbows and the cut a small splinter more of the arms to get the angle I wanted for the arms when glued back on.
Then it was time for Barbie to get her hair done. I put the hair into a bun using a small hair band and cut of the rest of the length of hair. The rest of the hair then got a bath in liquid glue, to keep it in place. Maybe hairspray could also have done the job, but I did not have any around at the time. Finally I added a ring around the head using hot glue, moulding it to look like the headband the weeping angels have in the series.
With her hair done Barbie was ready to be attached to the can. For this I used hot glue, which I found had no problems sticking to the plastic, but I still used plenty to avoid it breaking later in the process.
Next up was the dress. This was probably my biggest problem. I never figured out exactly how it was done in the original blogpost I read, so I ended up with my own version.
It cut out a piece of old fabric as shown in the top left picture below, and then glued it on to the Barbie doll in stages. First the shoulder straps and then each of the sides. Finally I cut a small strip of fabric and tied around the waist of the doll as her belt.

After the dress I reattached the arms. I found that sanding the stumps smooth and then scratching them with a knife gave me a surface which were smooth enough for the arms to fit onto the stumps but also rough enough for the glue to have something to hold onto.

Next up painting. I decided to put on the first layer of paint before adding the wings in order to ensure the Barbie's back would be sufficiently covered. The angle in the picture is my first try. She had a piece of red string for a belt, which proved to be very hard to cover with the paint. So the second time around I used a fabric belt instead.
First I covered the Barbie in gray primer. Then I attached the wings and gave the hole thing another layer of primer. Before spraying the angel with a granite mimicking spray paint, to get the right finish. This took a couple of layers before I was satisfied. I learned to be really patient (not something which comes natural to me) before turning the angel to spray the next angle. Also the wings took a few coats to cover. Of course here I could have chosen to use feathers of with a more neutral colour than orange and yellow, but I was to cheap to buy the other colours at double the price at the craft-store. Maybe I would have saved some paint, but done is done.
This is what the finished Weeping Angel look like. I think she turned out pretty well, and she was definitely fun to do. If I had not been distracted by finding my way back to reality after six intensive months of thesis work she probably would not have taken a month to complete. I would think you could probably make one in a day of two. The time consuming steps are the drying, which you cannot really get around.


After I finished her, I gave her as a gift for Lora, and she moved across the country to live in Sonderborg on Lora's bookcase.

If you want to see more pictures of the process check out the photo album here.

Enjoy :)

- trager


mandag den 23. februar 2015

Darth Maul - the beginning

So, in January I started work on a Darth Maul robe for my nephew, but didn't get very far. I did some more work in the first half of February and have currently put it on hold to try and make a jacket for myself.

This first thing I did when I got the idea for the costume, was to make a couple of work sketches to help me keep track of seams and layers. This costume has a lot of layers... And they're all black. Fun fun.

My costume sketches after an evening of research looked like this:


Note, I'm only doing the robe right now, and I'm cutting down heavily on the folds. (My sketch also have the short leg problem).

I started out with making a pattern for the shoulder support. This needs to be double layered with slightly differences between inner and outer layer.


I then worked on the sleeves. The sleeves are a bit funny due to their seamline in the middle and the square shape of them. Firstly I just did the top to test how it fitted with the support piece.


I did a test on some brown fabric I had lying around and then went on to the black fabric when my test went well.

Inner back and front support piece:


This is what the support pieces looks like:


The pieces have been sewn together along the shoulder seam. I added some extra width, so it will be possible to later maker it wider across the shoulders.


Then came the sleeves. There's one pattern for the top part and one for the bottom part. I needed two of each.


Finally, I sewed the sleeves together, leaving them open in one side for the forearm and hand to poke out.


This is where I'm currently at. Next up is the main part of the robe, which I'll look at sometime after the 22nd of Marts. :)

mandag den 5. januar 2015

Plans for 2015

Hiya.

So, I finished Ewok Village Leia in November, but this won't be about that.

Instead I wanted to talk a bit about what plans I have regarding stuff to make.
It's a bit of a mix between costumes and general wear items, but my tentative list is as follows:

A Darth Maul robe for my nephew
A jacket for a wedding
Pants
Mara Jade cantina waitress
Night gown
Jedi belt
New jedi robe
Maybe a pillow case of silk
Upgrade to Weeping Angel

The above list is written in the order I expect to do things. I'm not sure if I can get the Maul robe done quickly, even if I take some liberties with the pleating, and I have to have the jacket done by mid Marts.
The only reason the pants are on the list before Mara Jade is because I need to learn how to make pants before I can make that costume. But I've got a couple of different patterns to try out, so hopefully I can get the result I want.

Honestly, I don't know if this is too ambitious; I tend to work in small, concentrated spurs and then not work for a while, and this will require working a couple of days every week for some time to come.

I expect my next update to be an actual costume update.

~Lora

onsdag den 5. november 2014

Hello all and welcome to our new costume and crafting blog.

Who are we you might ask?

We are the clones, Lora and trager. Two geeky young ladies from Denmark, who enjoy creating costumes and craft-works for fun. We are fans of several fandoms, among them Star Wars, Stargate, Harry Potter and Doctor Who.
We continually work to improve our crafting and costuming skills and are always willing to learn new skills and trades in order to complete our projects.

So, let us introduce ourselves.

Lora:
I currently live in Southern Denmark, where I work as a librarian. I make costumes and other creative stuff in my spare time, where I also read a lot on the internet, read books (in good old fashioned paper form), play little games and what else catches my eye.
I’m very knowledge hungry and curious so I tend to be a bit of a sponge when it comes to information. ;)
I have in the past mostly focused on Star Wars costumes, but since becoming a Whovian I’ve made two Doctor Who costumes as well. One of them is on the list of costumes to be upgraded.
A good deal of my costumes have been made specifically for movie premieres, like Harry Potter and The Hobbit. A couple of costumes have also been made for parties, which are usually the costumes that are of a lower quality and where I don’t worry about accuracy.
I’m a member of Rebel Legion and also have a RPF profile, but I haven’t really posted there. Mostly I just look at what others do.

My current costumes include:
  • Jedi Knight (two of them)
  • Princess Leia, ceremonial dress
  • Handmaiden, flamegown
  • Tenth Doctor
  • Weeping Angel (to be upgraded before use again)
  • Ravenclaw student
  • Professor McGonagall (made for Halloween, also on the upgrade list)
  • Goa’uld party costume (could easily be used for other things than Goa’uld)
  • Ørkenens Sønner (Sons of the Desert, Danish satire group)
  • Lord of the Rings elf costume

Costumes that are currently being worked on or where I/we have materials for:
  • Ewok Village Leia
  • Weeping Angel
  • X-wing pilot
  • Mara Jade cantina waitress
Besides the costumes I’ve made for myself I’ve also helped many friends with their costumes. :)


trager:
I currently live in the capital of Denmark, Copenhagen. I recently finished my Masters Chemical Engineering and are therefore currently unemployed, but that is something I hope to rectify very soon. I do a lot of different crafting projects as well as dabble a bit in costuming. Mostly I throw myself into whatever catches my interest and seems even remotely doable.
In my free time I also read a lot of books and fanfiction, play board games, whenever I can get a group together, and spend a lot of time in the kitchen cooking and experimenting with food.
My main fandoms of interest are Star Wars and Stargate. Though I am also a bit fan of Tolkiens universe.

Currently I only have three costumes, two random Jedi and a x-wing pilot, though none of them are actually whole and wearable at the moment, do to different failings.

In the future I am planning a new Jedi tunic, as one of the current tunics got pulled apart last time I wore it, and I am also working a bit on a Kili costume for the premiere of next Hobbit movie.